Glows.ai Auto Deploy Use Case
Typically, deploying GPU-based services requires manually creating instances before use and releasing them afterward. This process becomes inefficient and inconvenient when GPU workloads are intermittent or request-driven.
Glows.ai addresses this challenge with Auto Deploy —— a service that automatically manages GPU instances. Once configured, Auto Deploy provides you with a fixed service endpoint. When a request is sent to this endpoint, Glows.ai automatically creates an instance based on your configuration, executes the request, and returns the result. If the endpoint remains idle for a continuous period of n minutes, Glows.ai will automatically release the instance.
In the following example, we’ll demonstrate how to use Auto Deploy with the BreezyVoice WebUI image.
Currently, you can customize the Instance Idle Retention Period and the Maximum Number of Instances.
- Instance Idle Retention Period: The duration an instance will remain active without receiving new requests before being automatically released.
- Maximum Number of Instances: The maximum number of instances that can be launched under a single Auto Deploy.
For scenarios compatible with previous logic, Random and Round Robin modes are also supported (for details on usage, refer to the Advanced Usage).
Basic Usage
Configuring Auto Deploy
Enter the Auto Deploy and click the New Deploy in the top right corner to create a new configuration.

Set the configuration name and description for easier identification.

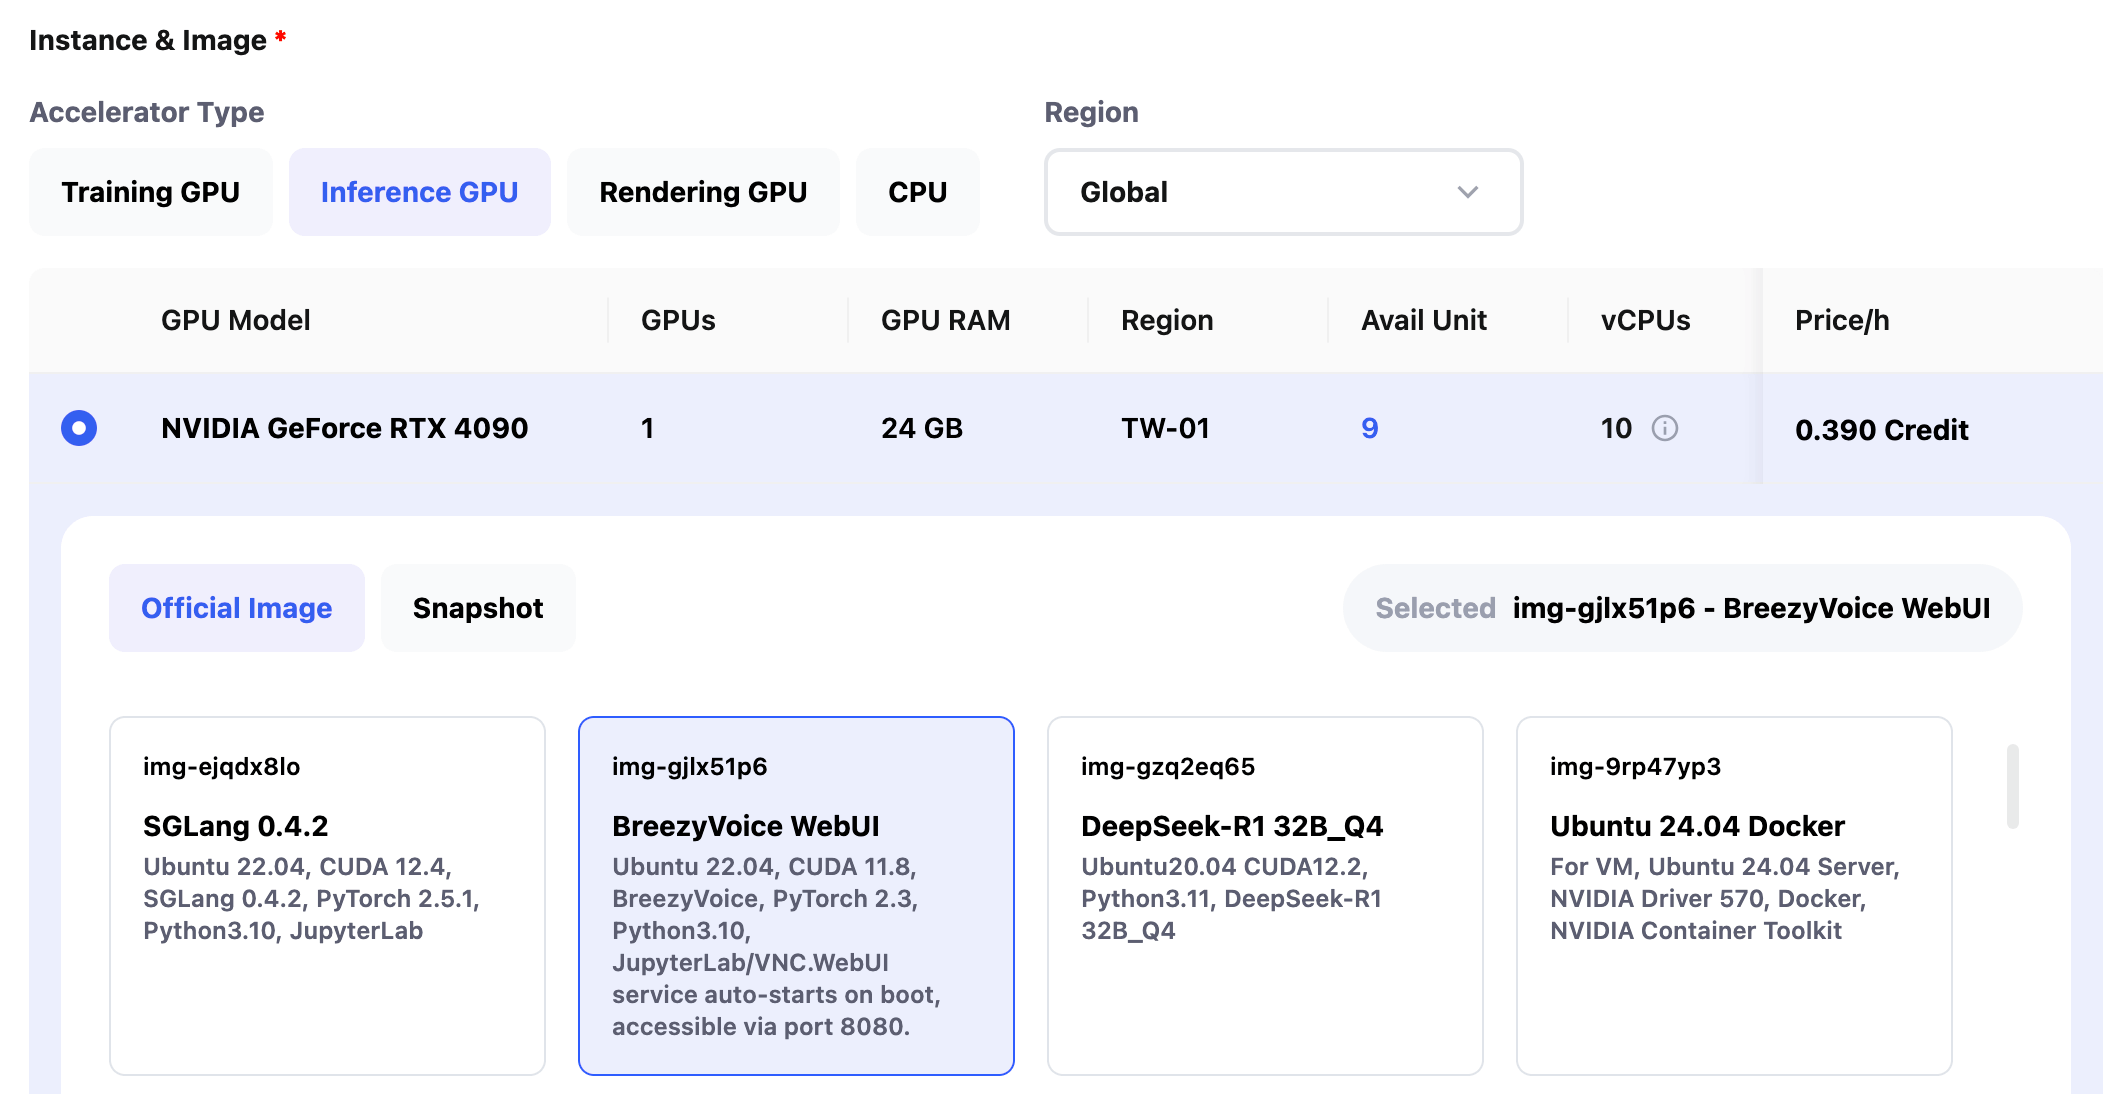
Choose the GPU and environment required for the program to run. You can select either a custom snapshot you’ve created or a prebuilt system image.

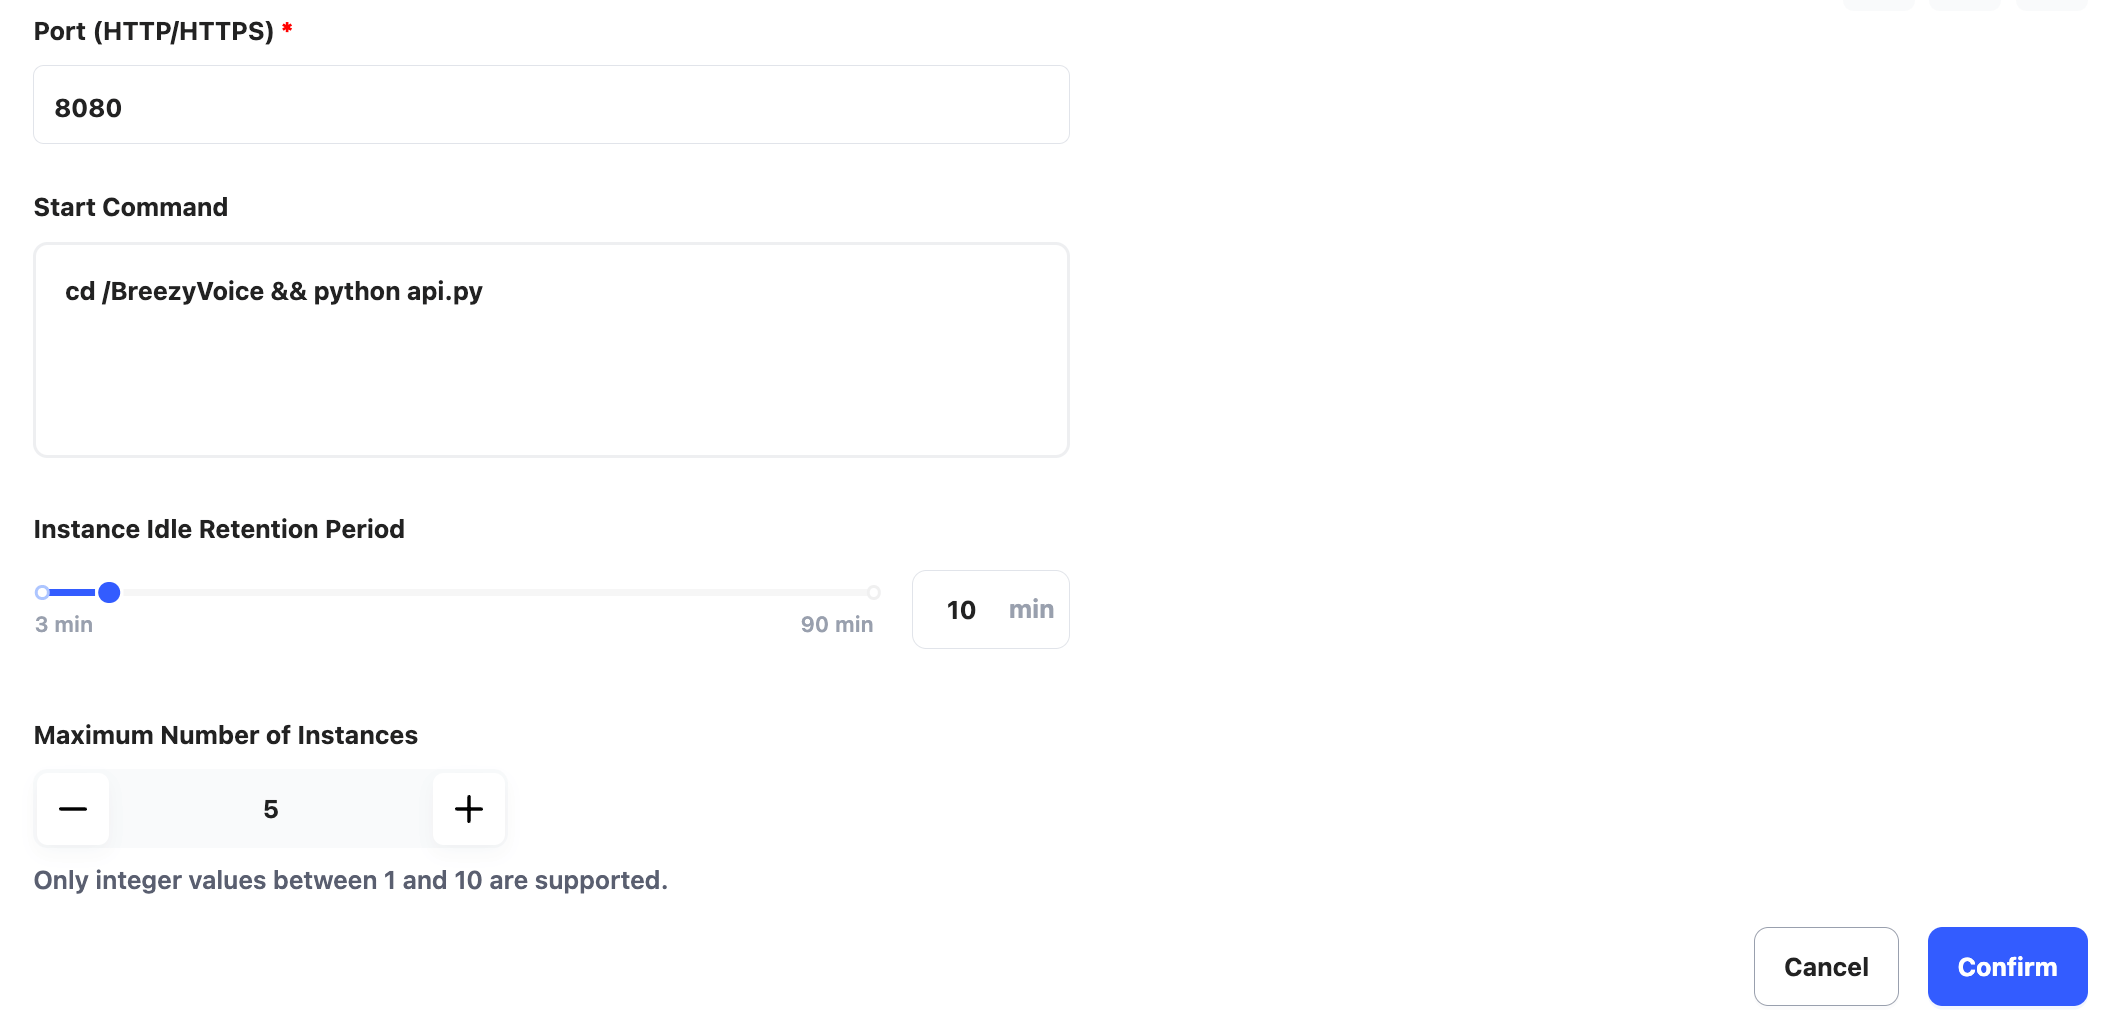
Set the service port (Port) and the start command (Start Command) for the code.
In this case, our service starts on port 8080, and the service code is located at /BreezyVoice/api.py, so the service port and start command are set as follows:
Port: 8080
Start Command: cd /BreezyVoice && python api.py
Set the Instance Idle Retention Period to 10 minutes and the Maximum Number of Instances to 5.

Finally, click Confirm to complete the configuration.
Configuration Information
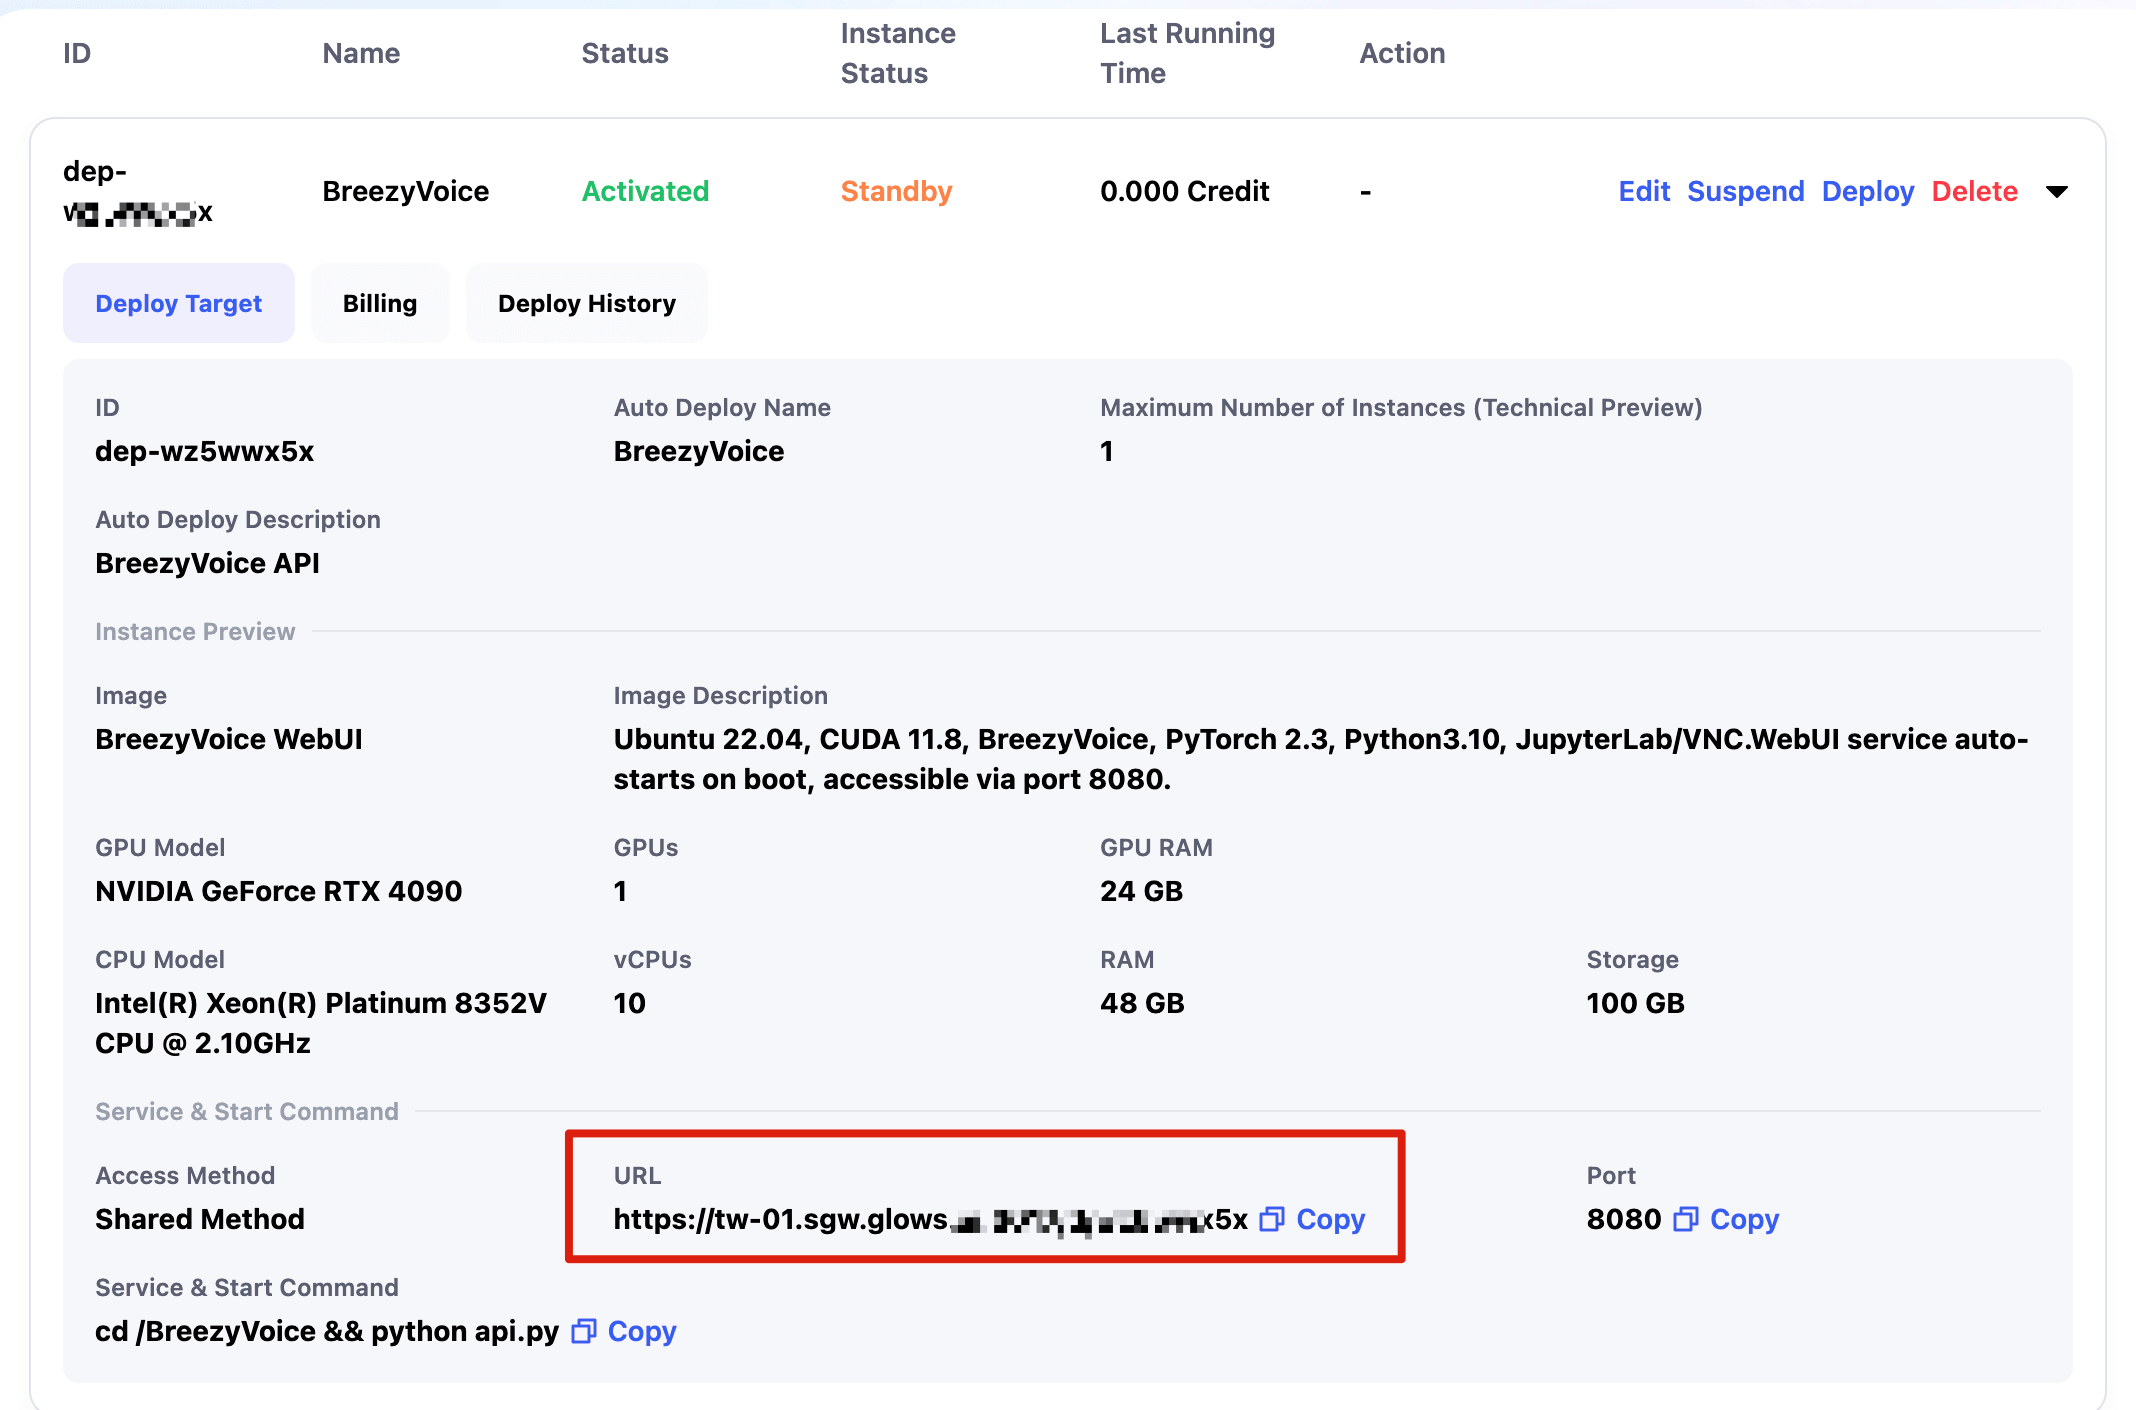
Once the configuration is complete, you will see the corresponding service link and the details of the configuration.

Request the Auto Deploy Endpoint
Simply replace the API link with the Auto Deploy link. If the service provides its own routing, add the relevant path after the Auto Deploy link. For example, the API request path for the service is deployed as /v1/audio/speech.
curl -X POST "https://tw-01.sgw.glows.ai:xxxxxx/v1/audio/speech" \
  -H "Authorization: Bearer sk-template" \
  -H "Content-Type: application/json" \
  --data '{
    "model": "tts-1",
    "voice": "alloy",
    "input": "How about playing basketball after school? The weather looks great today."
  }' --output test_speech.wav

After the request is complete, if no new requests are sent within 10 minutes (based on the Instance Idle Retention Period setting), the instance will automatically be released. The Auto Deploy interface will also display the total cost for the configuration and the Instance Status. The meanings of the Instance Status are as follows:
- Standby: Indicates the configuration is normal, but no instances are running.
- Idle: When a request is received, it indicates that the instance is being created. After the request is processed, the instance is being automatically released.
- Running: The instance has been successfully created and is processing requests. After the request is processed, it will continue to wait for new requests. If no new requests come in for 5 minutes, the instance will be automatically released.

Advanced Usage
For use cases requiring compatibility with the previous handling logic, the Random and Round Robin modes are also supported. You can set the Deploy-Route-Rule parameter in the request header, which supports the following values:
- scale-out: Start a new instance and return the result.
- If the total number of started instances equals the Maximum Number of Instances, an error code will be returned:
{"code": 1007, "msg": "deployment replica quota exceeded"}
- If the total number of started instances equals the Maximum Number of Instances, an error code will be returned:
- random: Randomly select a running instance to forward the request and return the result.
- If no instances are running, an error code will be returned:
{"code": 1006, "msg": "route target not found"}
- If no instances are running, an error code will be returned:
- round-robin: Forward the request to the next instance in sequence and return the result.
- If no instances are running, an error code will be returned:
{"code": 1006, "msg": "route target not found"}
- If no instances are running, an error code will be returned:
{Deploy-Route-Target}: Forward the request to a specific instance and return the result.- If the specified Deploy-Route-Target cannot be found, an error code will be returned:
{"code": 1006, "msg": "route target not found"}
- If the specified Deploy-Route-Target cannot be found, an error code will be returned:
In all four modes, the response header will include Deploy-Route-Target, indicating which instance the request has been forwarded to, making it easier for continuous requests.
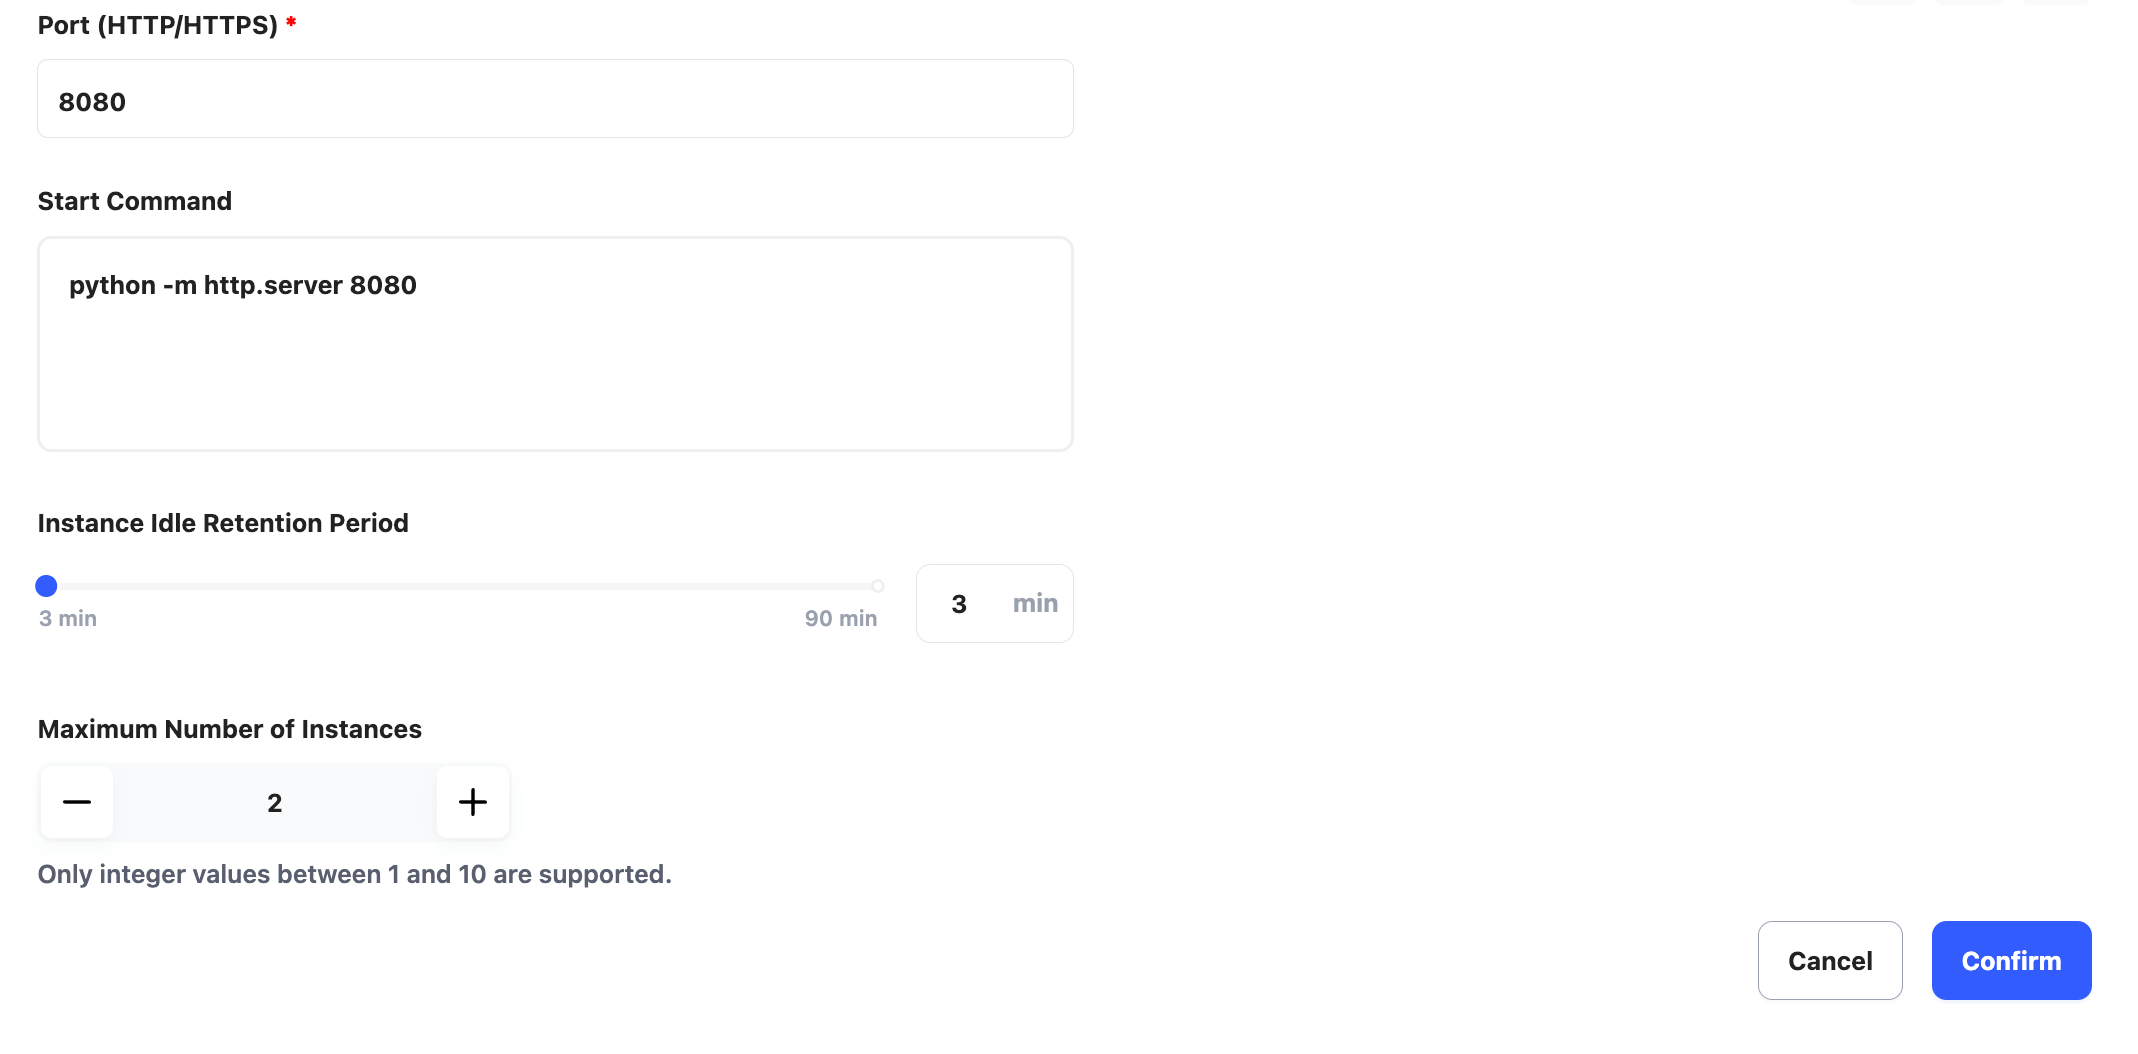
In the following example, our service starts on port 8080, and we use Python to create an HTTP server. Therefore, the service port and start command are set as follows:
Port: 8080
Start Command: python -m http.server 8080
In this tutorial, set the Instance Idle Retention Period to 3 minutes and the Maximum Number of Instances to 2.

scale-out Mode
Requesting this mode will start a new instance and return the result.
curl -i \
  -X GET "https://tw-07.sgw.glows.ai:20017/d/xxxxx" \
  -H "Deploy-Route-Rule: scale-out"
The response header will display the Deploy-Route-Target value, which corresponds to the instance ID visible in the interface. You can also directly invoke the corresponding service in the instance by specifying Deploy-Route-Rule as the instance ID.

Note that if the total number of instances started through this Auto Deploy has reached the Maximum Number of Instances, requesting this mode will return an error code: {"code": 1007, "msg": "deployment replica quota exceeded"}.
random Mode
From the instances started by Auto Deploy, randomly select one instance to forward the request and return the interface result.
curl -i \
  -X GET "https://tw-07.sgw.glows.ai:20017/d/xxxxx" \
  -H "Deploy-Route-Rule: random"

When two or more instances are running, the Deploy-Route-Rule in the response header will change randomly on consecutive requests.

If there are no instances running through this Auto Deploy, calling this mode will return an error code: {"code": 1006, "msg": "route target not found"}.
round-robin Mode
The request will be forwarded sequentially to the started instances and return the result.
curl -i \
  -X GET "https://tw-07.sgw.glows.ai:20017/d/xxxxx" \
  -H "Deploy-Route-Rule: round-robin"
When two or more instances are running, making consecutive requests using this mode will show that the Deploy-Route-Rule value in the response header changes sequentially.

Note that if no instances have been started by this Auto Deploy, requesting this mode will return an error code: {"code": 1006, "msg": "route target not found"}.
{Deploy-Route-Target} Mode
The request will be forwarded to a specified instance and return the result.
curl -i \
  -X GET "https://tw-07.sgw.glows.ai:20017/d/xxxxx" \
  -H "Deploy-Route-Rule: xykemlvy"
This mode is very useful when a request requires multiple interface calls consecutively.

Note that if the specified Deploy-Route-Target cannot be found, calling this mode will return an error code: {"code": 1006, "msg": "route target not found"}.
Contact Us
If you have any questions or suggestions while using Glows.ai, feel free to contact us via email, Discord, or Line.
Email: support@glows.ai
Discord: https://discord.com/invite/glowsai
Line: https://lin.ee/fHcoDgG
 Speed up your innovation with Glows.ai, Scale up your large model training